I’m running Docker host VM on Proxmox and I want to put containers into different VLANs. There are 4 things you need to do:
1. Network port going to Proxmox hypervisor has to be trunk carrying VLANs (you need to setup this on your switch and router)
2. Network bridge in Proxmox has to be VLAN aware
3. Ubuntu guest VM (Docker host) needs VLAN interfaces to be configured
4. Add new network in Docker using VLAN
1. I will not cover how to setup trunk on your switch or router in this post.
2. VLAN aware bridge in Proxmox
Proxmox bridge has to be aware of VLAN trunk (tagged) traffic in order to pass it down to guest virtual machines.
Go to Datacenter -> proxmox -> Network -> vmbr0 -> Edit and tick VLAN Aware:

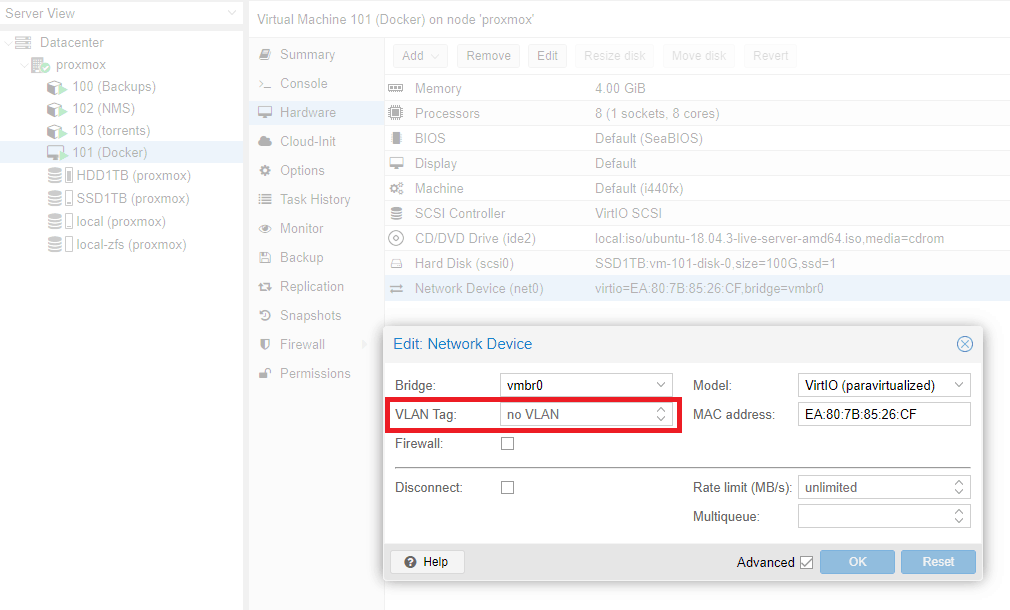
3. VM guest (Docker host) – Create VLAN interfaces
First off, in the Proxmox guest VM network device config, remove VLAN tag if you have one. That means all VLAN tagged traffic will go to guest VM.
Now login to your guest VM (Docker host) and add VLAN interfaces.
Ubuntu 18.x and later uses new type of network configuration using yaml files with netplan. Method for setting up vlans with previous version of Ubuntu is a little bit different, but the main principle is the same.
nano /etc/netplan/50-cloud-init.yaml
# This file is generated from information provided by
# the datasource. Changes to it will not persist across an instance.
# To disable cloud-init's network configuration capabilities, write a file
# /etc/cloud/cloud.cfg.d/99-disable-network-config.cfg with the following:
# network: {config: disabled}

network:
    ethernets:
        ens18:
            dhcp4: true
    version: 2
    vlans:
        vlan.20:
            id: 20
            link: ens18
            dhcp4: true
        vlan.30:
            id: 30
            link: ens18
            dhcp4: true
Replace ens18 with your parent network card. Add vlans accordingly. Since I map MAC addresses to IPs on my router I configured DHCP for VLAN interfaces. If you want to assign IP in the config, use directive “addresses: [172.16.0.2/24]” instead. Be aware, yaml files will not work with TABs, use spaces instead.
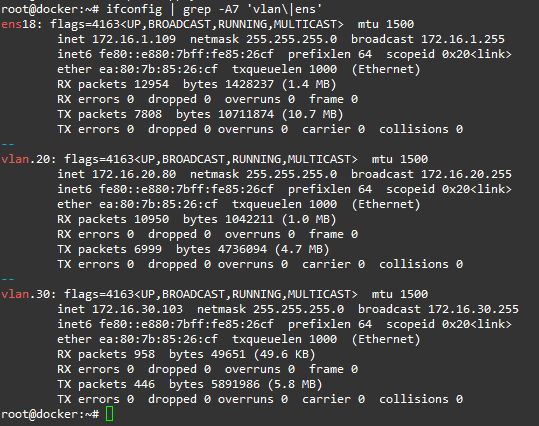
netplan apply
Your VLANs should be up and running:
4. Create new network for Docker
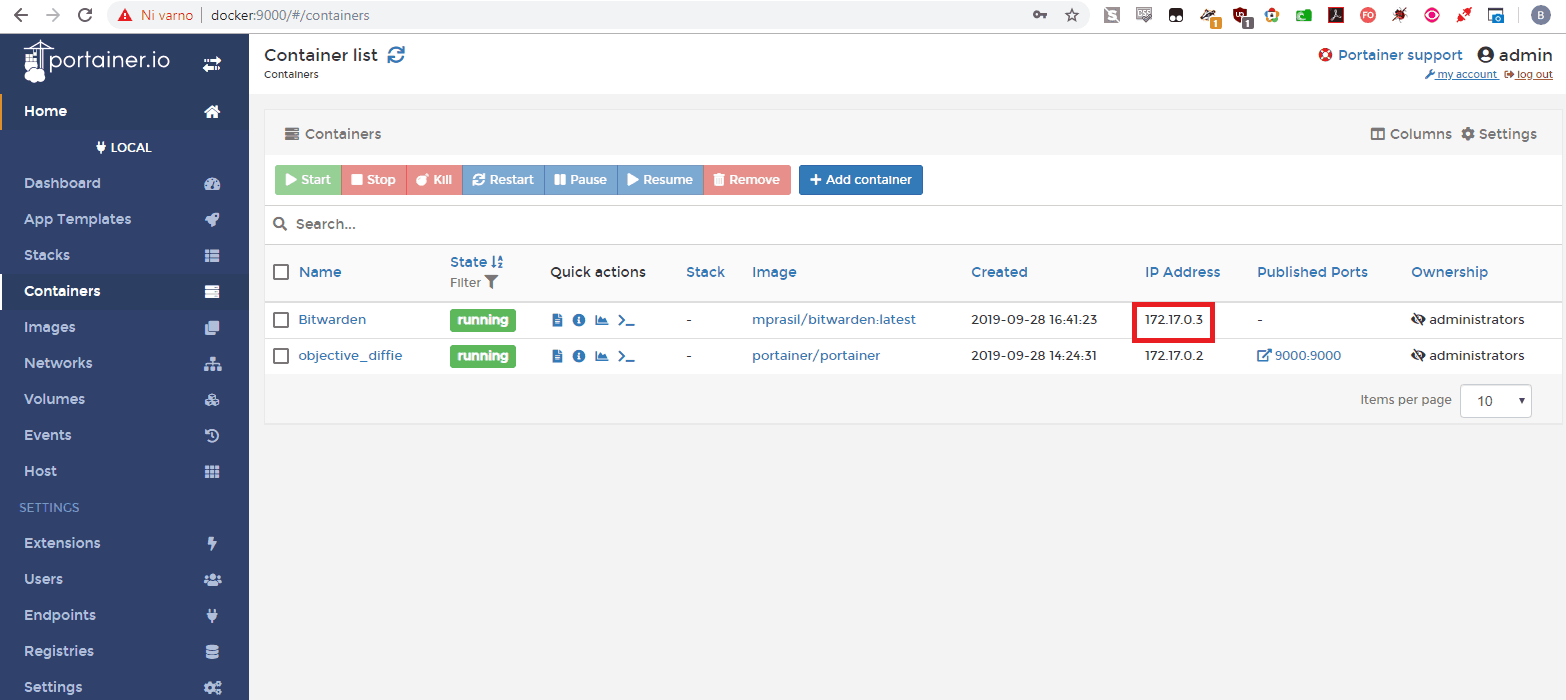
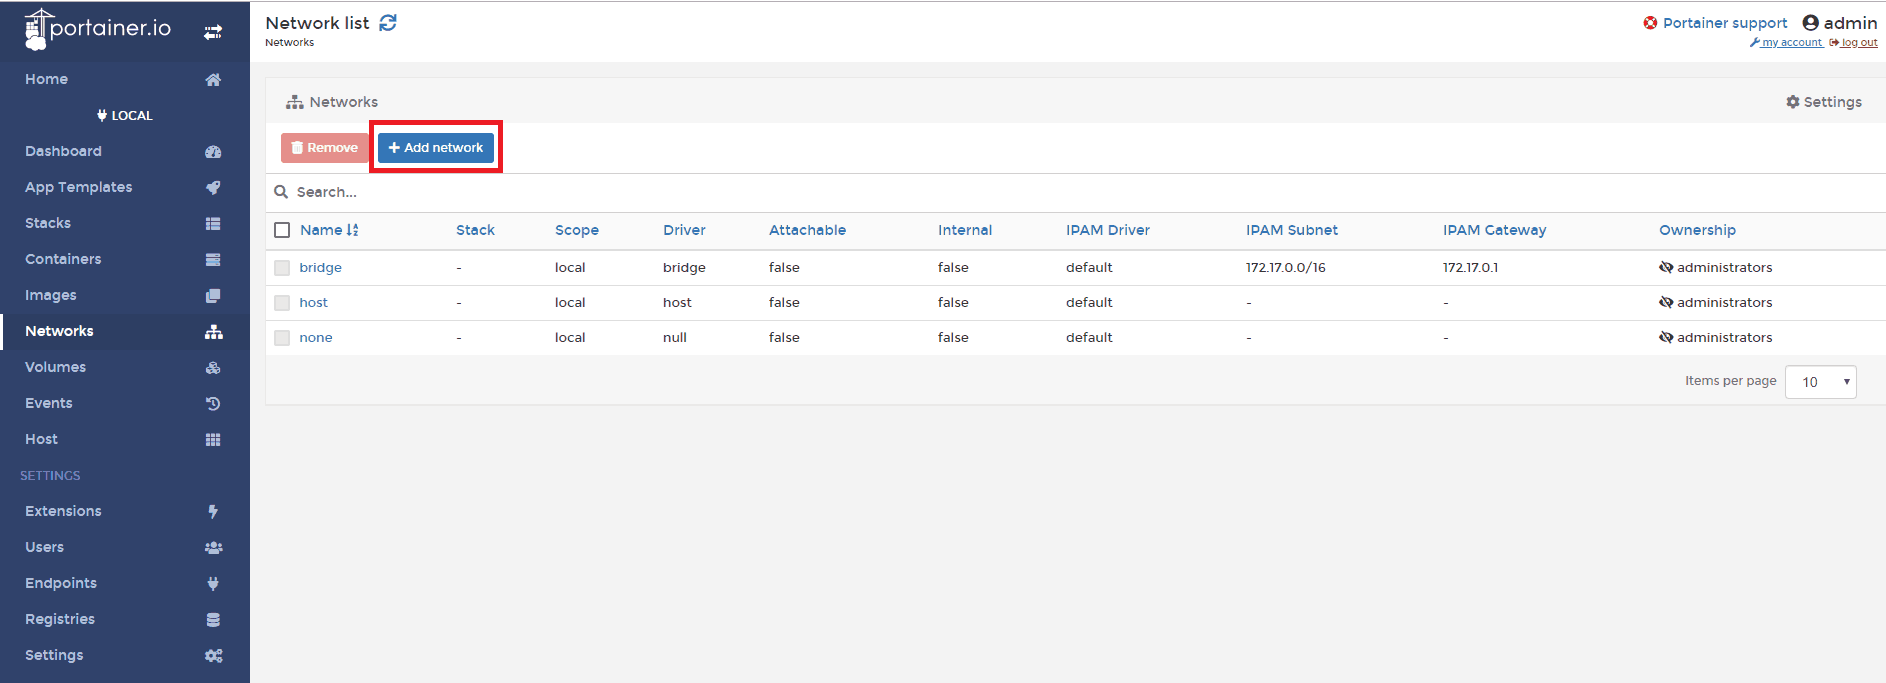
I’m using GUI for managing Docker called Portainer.
Go to Networks and click + Add network
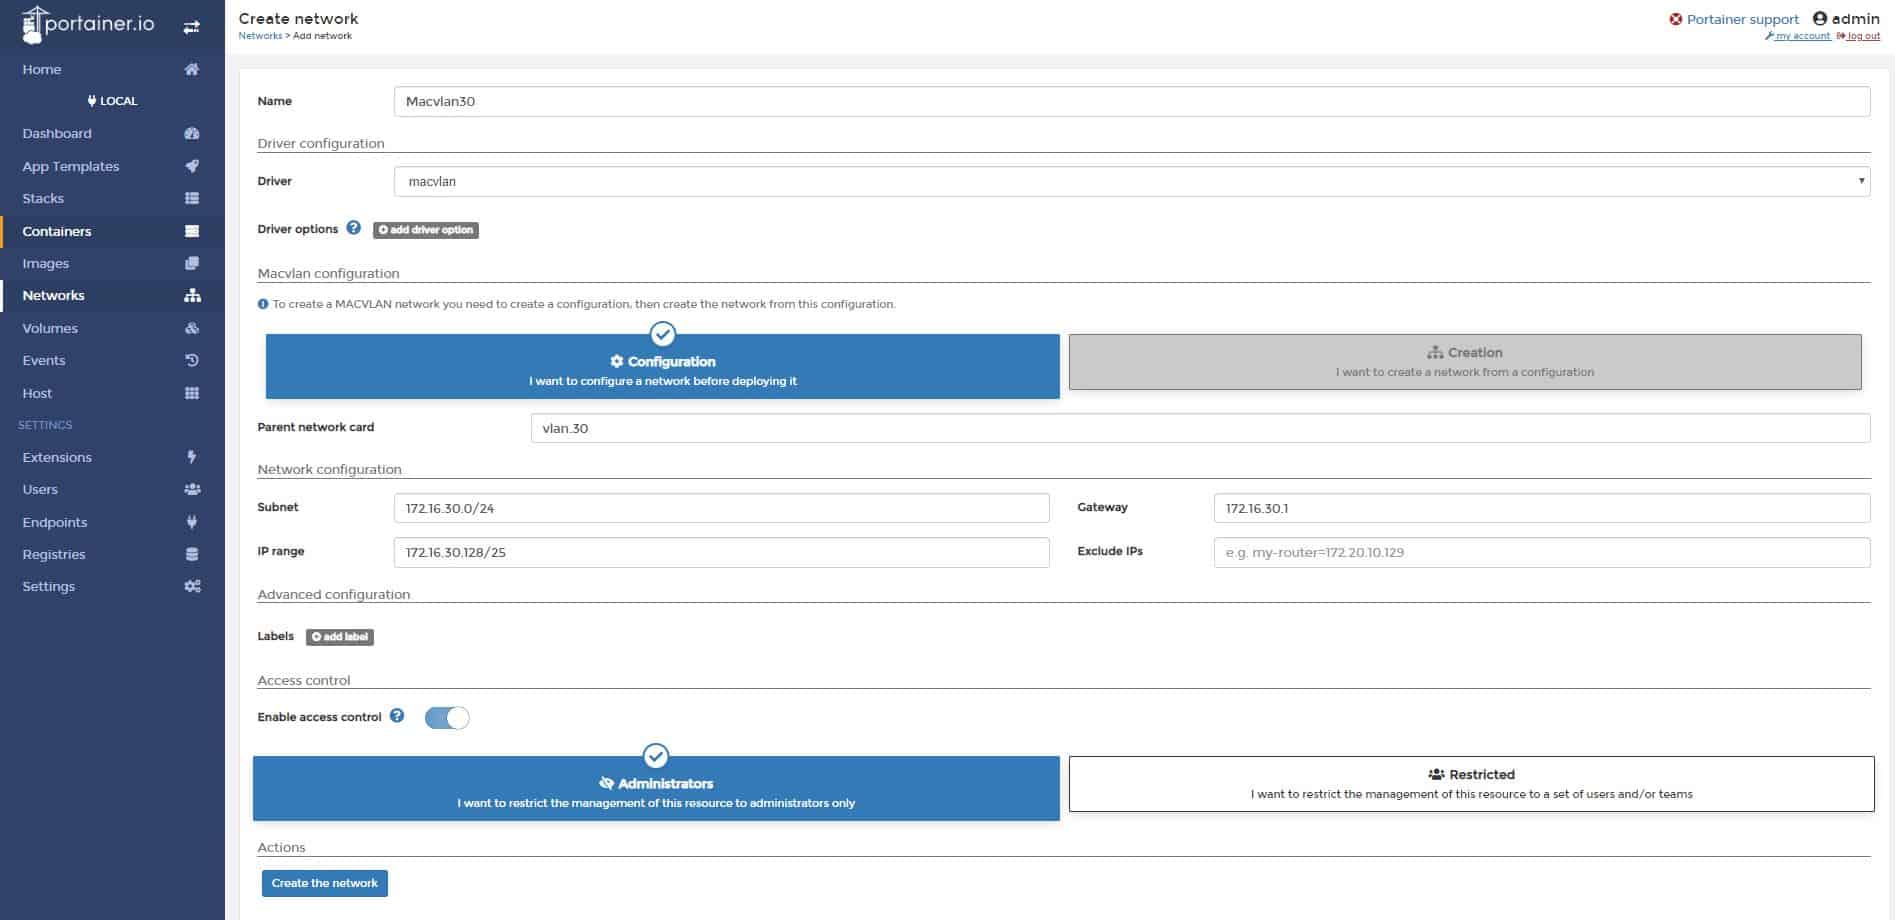
Name: Macvlan30
Driver: macvlan
Parent network card: vlan.30
Subnet: 172.16.30.0/24
IP Range: 172.16.30.128/25
Gateway: 172.16.30.1
Click Create the network
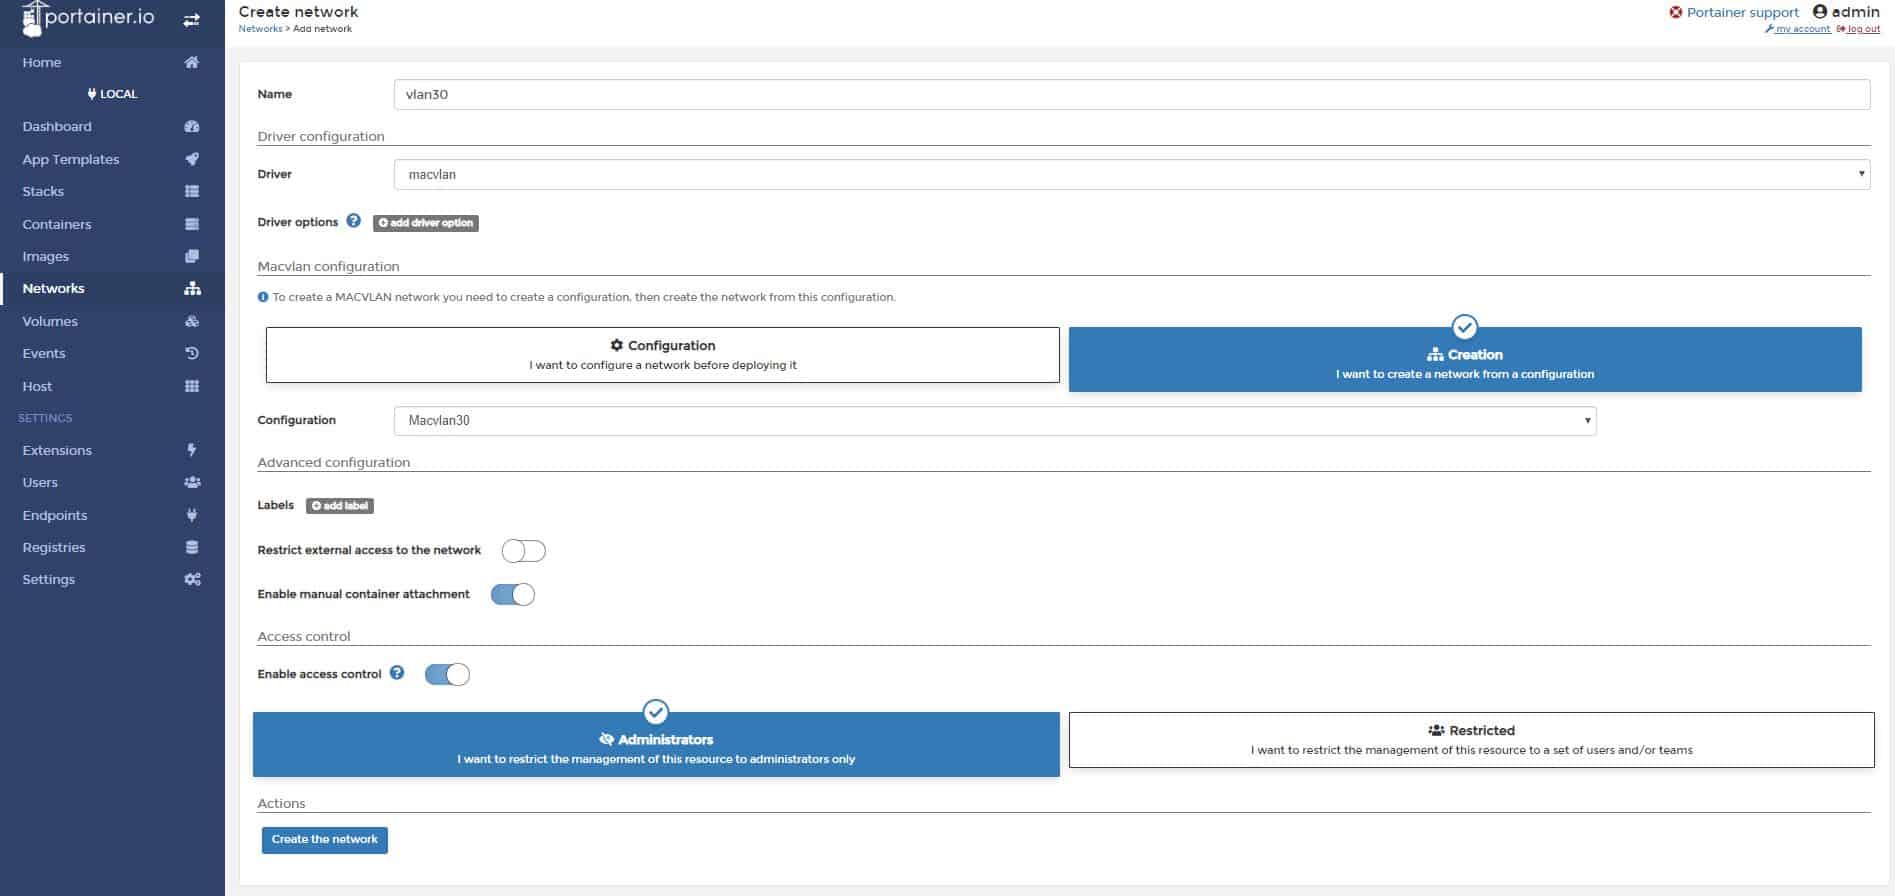
Now we need to deploy the network. Click + Add network again.
Name: vlan30
Driver: macvlan
Macvlan configuration: select I want to create a network from a configuration
Configuration: Macvlan30
Enable manual container attachment: yes
Click Create the network.
Your new network is now ready for docker containers.
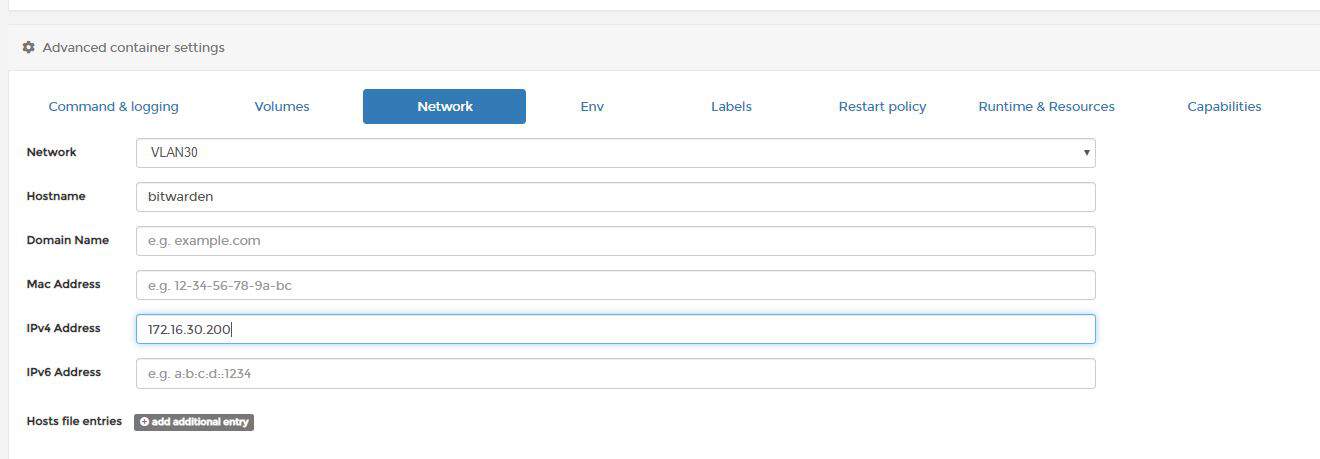
If you want assign a container to a network, go to Containers -> select container, go to the bottom and leave existing networks, then join a network vlan30.

Start the container, you should fall into vlan 30.

One caveat: DHCP request will get to your router, but you won’t get a response, because the host is not listening on the virtual MAC of the adapter so you’ll need to assign IP address of container manually or use experimental DHCP driver. You can also use Portainer GUI in container network options: