To connect via RTSP:

rtsp://camera_username:camera_password@IP:rtsp_port/live/ch00_1

Example:

rtsp://admin:admin123@192.168.30.102:554/live/ch00_1

If you are filtering outgoing connections, allow this outgoing ports to camera:

554 TCP

6970-6990 UDP

You can test RTSP stream with VLC media player.

Possible bug: When you connect to the camera with your phone, disconnect from it and then try to open rtsp stream in VLC media player, it will only load the first frame and stuck there. You need to reboot the camera, connect to rtsp with VLC media player without accessing it via mobile device.

Extra note: It’s advisable to block outgoing traffic from camera into internet. My camera is connecting to some IP with weird ports.

Quick whois showed me this IP belongs to alibaba.com. I did not sniff the traffic, so I’m not sure if the nature of it is spyware. It’s probably their cloud service or some other service.

For the extra paranoid, physically disconnect the microphone on the camera:

UPDATE: Apparently they are willing to refund me via 3rd party company (Bluesnap) that handles paysafecard payment processor for them. And if that’s not enough, that I have to utilize 3rd party business to get my money back, guess what, they are unable to refund me directly to my paysafe account, they require my bank account name, IBAN and BIC. They make it almost impossible to get your money back. Avoid PureVPN scammers.

—————————————————————————————————————————————————————————

So this is what happened. I was looking for a VPN service that does not require a credit card, because I don’t have one. Then I found PureVPN, they have a lot of payment options including paysafe card. I went to the gas station, purchased paysafe card and funded my account. I bought PureVPN 2 year package for 69$ with paysafe card. To my surprise, VPN stopped working few hours after the purchase was made. I’ve checked my email and received a messsage from them noticing me about my VPN account being disabled due security measures. They wanted me to verify my account by sending them a scan of my credit card. So, WTF, I bought their service with paysafe card because I don’t have a credit card, and they want me to verify the account with the credit card? Why would I even buy their service with paysafe card if I had a f*****g credit card? Where’s the logic behind that? I replied to their message and told them I don’t have a credit card and if they don’t like it they should just refund me. They replied with some bullshit generic text “about caring for the customers, jada jada, bullshit, more bullshit”. On the top of that email, they sent another generic mail noticing me that they will suspend my account if I don’t verify it, with a credit card. Really, did you even read what I’ve wrote the last time about not having a credit card? So, their lack of understanding about my situation and not mentioning it in the replies by just sending me generic non personalized emails tells me that they are scammers and they are stealing money from customers. Also, the service sucks, during a few hours I had a chance to test their service I tried many different servers on a different continents. I have a 220 mbit line but their VPN bandwidth never exceeded 50/60 mbit. So F*** you PureVPN scammers, you can keep my money and shove it up your a**. I will never recommend your fraudulent services to anyone else ever. DO NOT BUY PUREVPN.

TL;DR:

  • Bought PureVPN with paysafe card because I don’t have a credit card
  • They disabled my account and wanted verification by sending them a scan of a credit card that I obviously don’t have
  • They did not want to refund me, they ignored my issue about not having a credit card
  • Service sucks, low bandwidth
  • DO NOT BUY PUREVPN

1st security measure email:

My reply:

Their second and third reply:

TL;DR:

Xerox phaser 3020 black ink percentage remaining – SNMP cacti data and graph template at the bottom of this post.


With some tweaks this method should also works for other brand printers.

With the help of this article: https://thwack.solarwinds.com/docs/DOC-171511 I could set up a cacti template for my Xerox 3020 printer. Some printers return ink level value in percents but in my case I got only the raw value.

1. Get SNMP toner max capacity value, OID for that is 1.3.6.1.2.1.43.11.1.1.8.1.1

root@cacti: snmpget -v2c -c public 192.168.0.251 1.3.6.1.2.1.43.11.1.1.8.1.1
SNMPv2-SMI::mib-2.43.11.1.1.8.1.1 = INTEGER: 700

700 is the raw value for 100% toner capacity.

2. Get SNMP toner current levels value, OID for that is 1.3.6.1.2.1.43.11.1.1.9.1.1

root@cacti: snmpget -v2c -c public 192.168.0.251 1.3.6.1.2.1.43.11.1.1.9.1.1
SNMPv2-SMI::mib-2.43.11.1.1.9.1.1 = INTEGER: 686

686 is the current raw value of my toner levels. To calculate toner ink percentage remaining we need to divide current raw value (686) with max raw value (700) and multiply it by 100. 686 / 700 * 100 = 98 (percentage of ink remaining). Since the max raw value is a nice number (700), we can just divide current raw value with 7, 686/7 = 98. We can use this formula for our CDEF definitions in cacti later. Remember, this is only for Xerox 3020, other brand printers can output different raw values and you need to correct this formula accordingly.

Xerox 3020 ink remaining percentage formula: raw_current_ink_level / 7

3. Login to cacti and go to Console -> Presets -> CDEFs

Click plus sign and create new CDEF and name it Xerox toner percentage

Click plus at CDEF Items.

CDEF Item Type: Special Data Source

CDEF Item Value: Current Graph Item Data Source

Click Save

Click plus at CDEF Items.

CDEF Item Type: Custom String

CDEF Item Value: 7 (this is the value cacti will use to divide raw data)

Click Save

Click plus at CDEF Items.

CDEF Item Type: Operator

CDEF Item Value: / (this will tell cacti to use a divide operation with the custom string we defined in a previous step).

Click Save

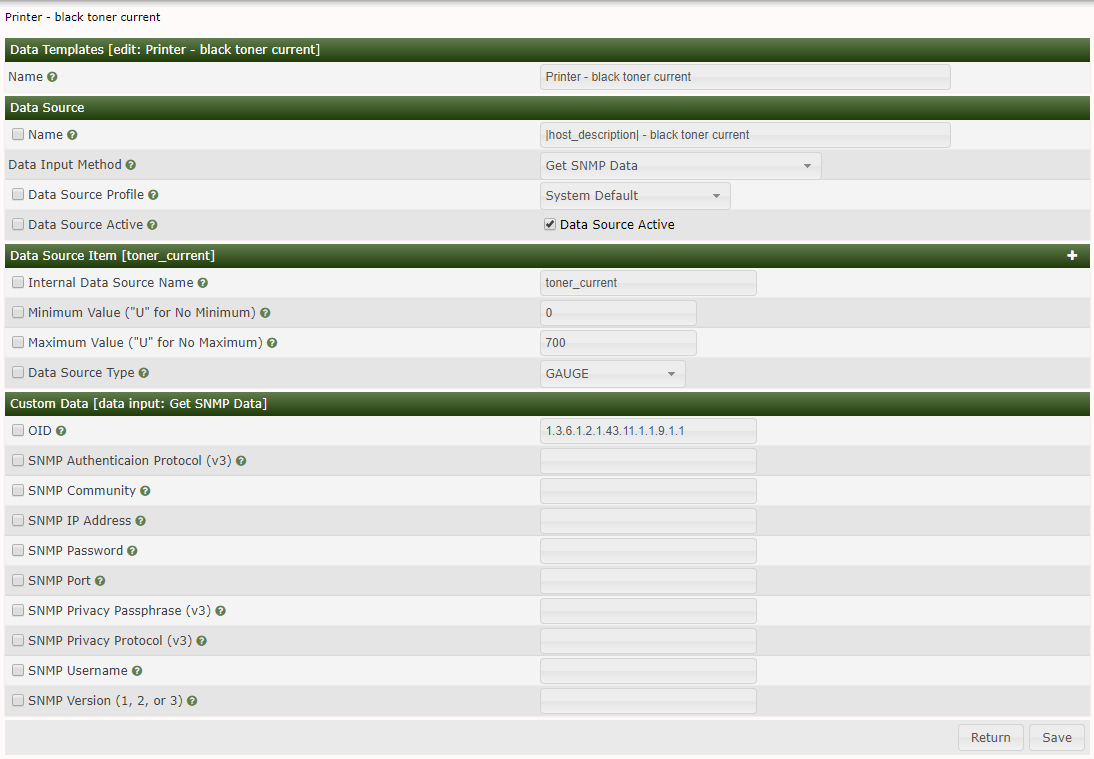
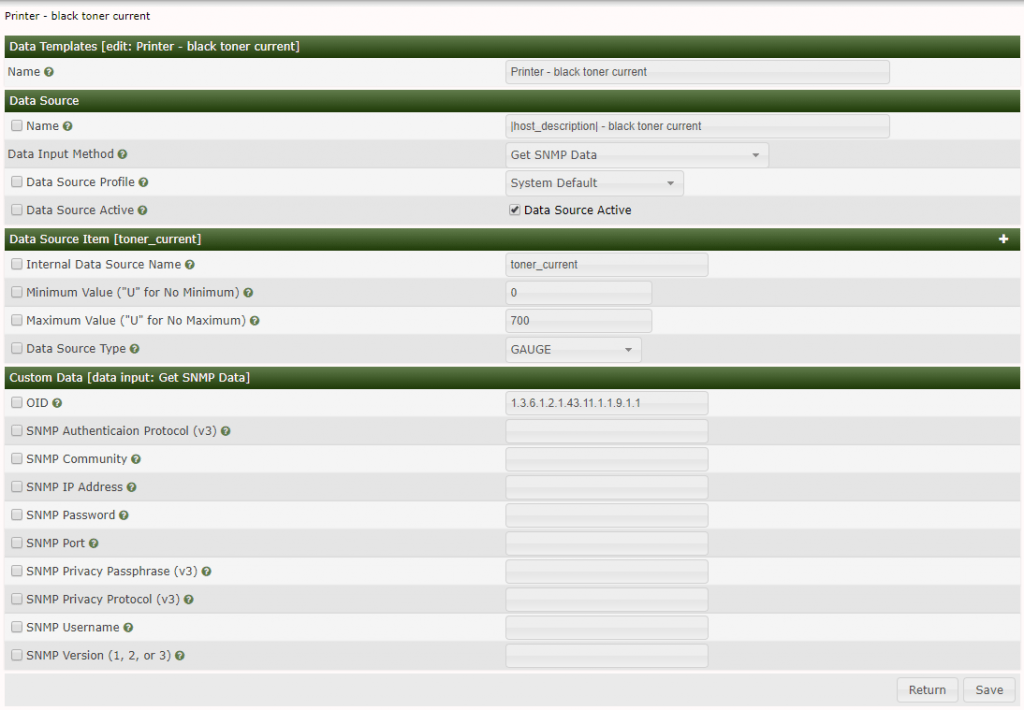
4. Go to Console -> Templates -> Data Source

Click plus to create new data source template and name it Printer – black toner current

Name: |host_description| – black toner current

Data Input Method: Get SNMP Data

Data Source Active: tick the right box

Internal Data Source Name: toner_current

Click Create

New Custom Data field will appear.

OID: 1.3.6.1.2.1.43.11.1.1.9.1.1

Click Save

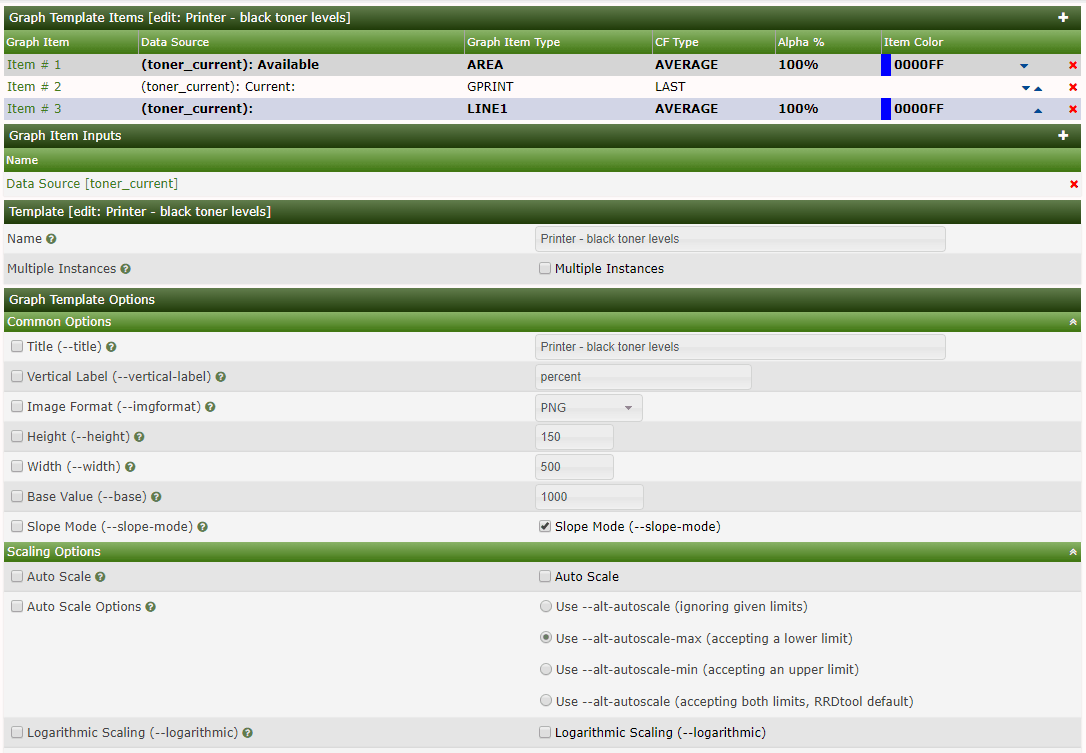
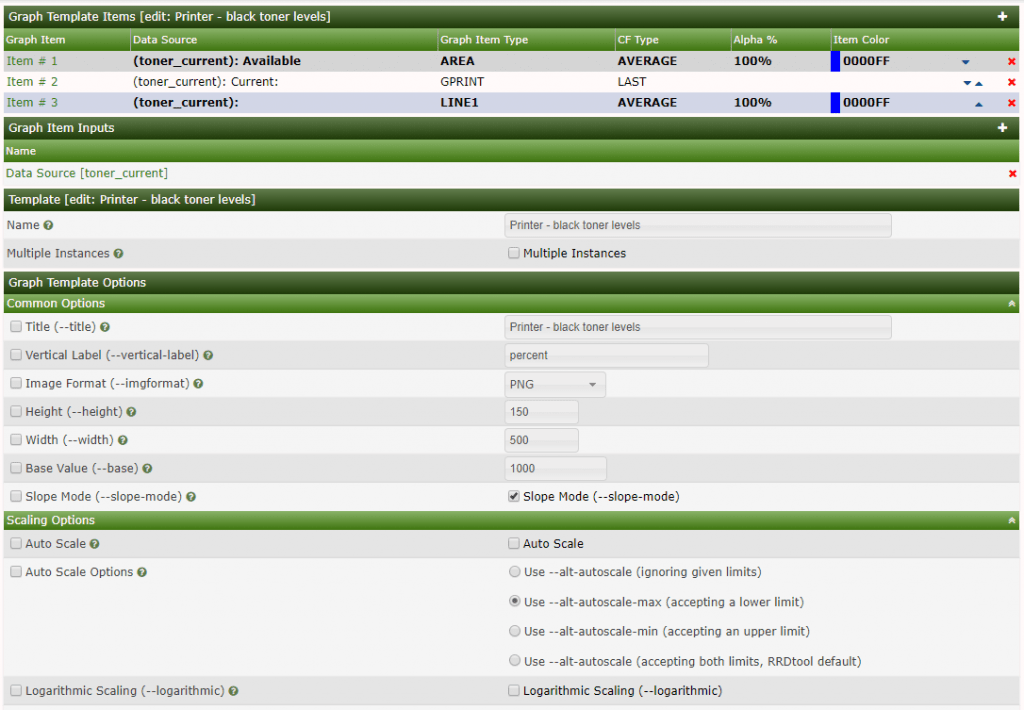
5.1 Go to Console -> Templates -> Graph

Click plus sign

Name: Printer – black toner levels

Title: Printer – black toner levels

Vertical Label: percent

Tick Rigid Boundaries Mode

Upper Limit: 100

Click Create

5.2 Now click plus sign at Graph Template Items

Graph Item Type: AREA

Data Source: Printer – black toner current

Color: select what you like

Consolidation Function: AVERAGE

CDEF Function: Xerox toner percentage

Text Format: Available

Click save

Add another Graph template item

Graph Item Type: GPRINT

Data Source: Printer – black toner current

Consolidation Function: LAST

CDEF Function: Xerox toner percentage

GPRINT Type: Percent(Round down to the nearest decimal)

Text format: Current:

Click Save

Add another Graph template item

Graph Item Type: LINE1

Data Source: Printer – black toner current

Consolidation function: AVERAGE

CDEF function: Xeror toner percentage

Save

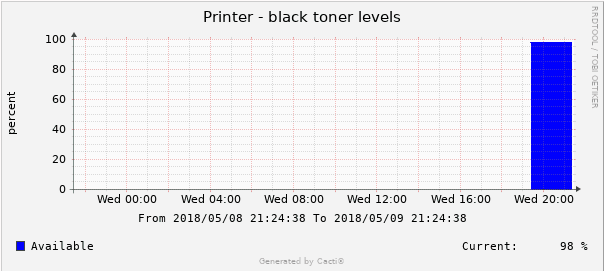
Your graph is now ready to device assignment.

Final result:

Download data and graph templates for xerox phaser 3020:

xerox_3020_cacti_toner_level_template


TL;DR:

  1. SSH login to QNAP
  2. Identify virtual switch you want to put into monitoring mode, in my case qvs1
  3. Set ageing to 0
brctl show
brctl setageing qvs1 0

My example:

I’ve created a virtual machine  (SecurityOnion) on my QNAP virtualization station to monitor my home network traffic. I have setup a port mirroring on my switch to send all traffic to the QNAP ethernet adapter number 2. (My QNAP has 4 ethernet adapters). Sniffing OS usually needs two ethernet adapters, one for management and one dedicated for monitoring (sniffing). I’ve created a new virtual switch in QNAP with adapter number 2 and set it to external mode (no IP address), then I assigned this virtual switch to monitoring interface in SecurityOnion. I should’ve been able to see all the traffic now, but that wasn’t the case. There were no packets flowing to my monitoring ethernet adapter. After some investigating I found out a reddit user had the same problem. This is the solution:

SSH into your QNAP with your admin username and credentials. Check your virtual switches with a command “brctl show“, this will list all virtual switches you created. Now you need to select the virtual switch you assigned to your sniffing ethernet adapter in my case, that was adapter number 2 and run the following command: “brctl setageing qvs1 0″, where qvs1 is the number of your selected virtual switch (one that will do the sniffing, in my case adapter 2, identified as qvs1). That’s it, you should see all packets on the sniffing interface now. Thanks go to the reddit user I don’t want to name due privacy concerns.

SecuritOnion is now receiving packets on the monitoring interface:

Side note: Sniffing and analyzing traffic is heavy on CPU, HDD and RAM resources. Qnap is not a suitable candidate for that. My Qnap tests showed a CPU bottleneck (quad core celeron N3160) averaging around 70% cpu usage with low network traffic and less than 20 devices on the network.