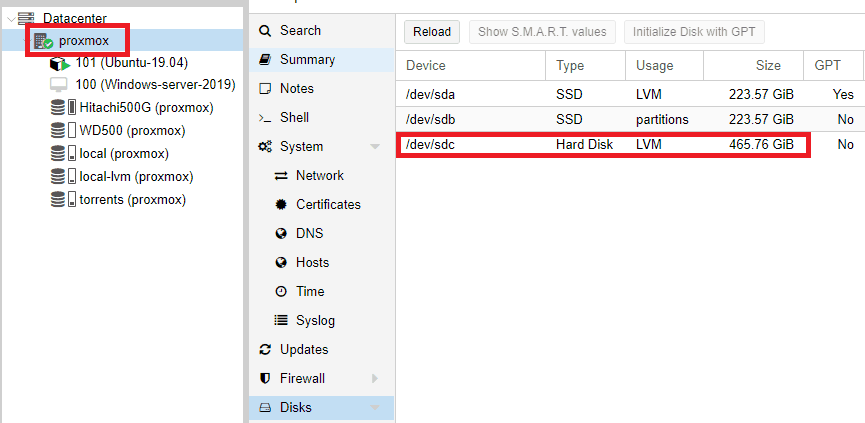
1. Login to the Proxmox webGUI, select desired node and click on disks. In my case, my new hard drive device is labeled as /dev/sdc.
2. Open Proxmox console and create disk partitions:
fdisk /dev/sdc
Create new partition: n
Select primary partition type: p
Leave the first and the last sectors default (press enter twice).
press w
Your new partition is now labeled the same as the hard drive device with an added number 1 (/dev/sdc1).
3. Create physical volume:
pvcreate /dev/sdc1
4. Create volume group:
vgcreate Hitachi500G /dev/sdc1
You can name volume group whatever you want, I named mine Hitachi500G.
5. Go back to Proxmox webGUI
Select Datacenter -> Storage -> Add -> LVM
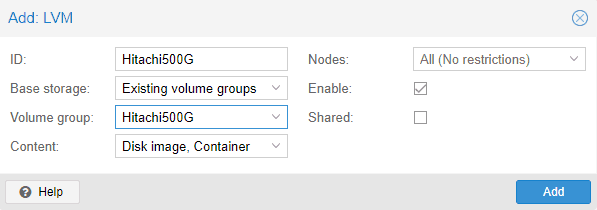
ID: custom name
Volume group: select the volume group you created in the step 4 and click Add.
Your new drive is now ready.
6. Create a shared directory on the proxmox host node (mount point)
Go to webGUI, click Datacenter -> Storage -> Add Directory
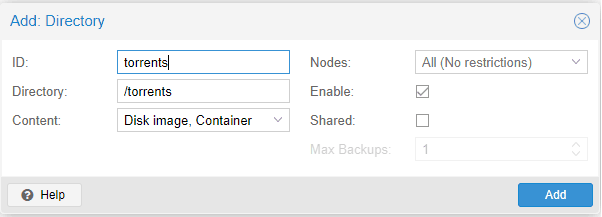
ID: custom name
Directory: enter your mount point
Content: Disk image, Container
Click Add
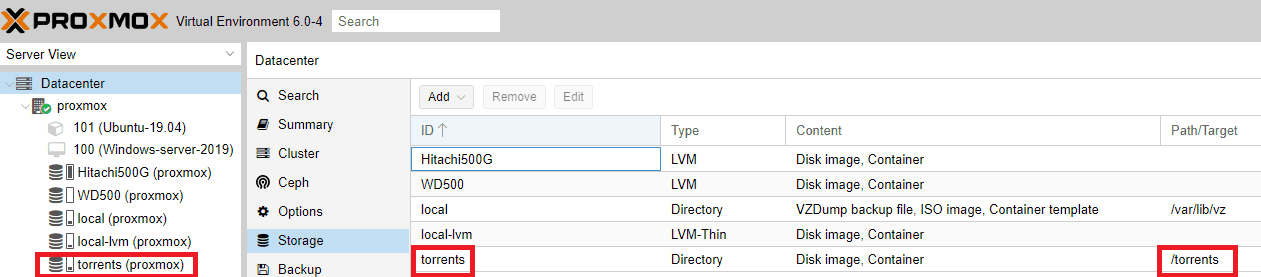
You should now see your new directory mounted on the proxmox host. You can now share
this mount point with multiple LXC containers.
7. Select your LXC container and shut it down. While your LXC container is selected, go to Resources and click Add -> Mount point
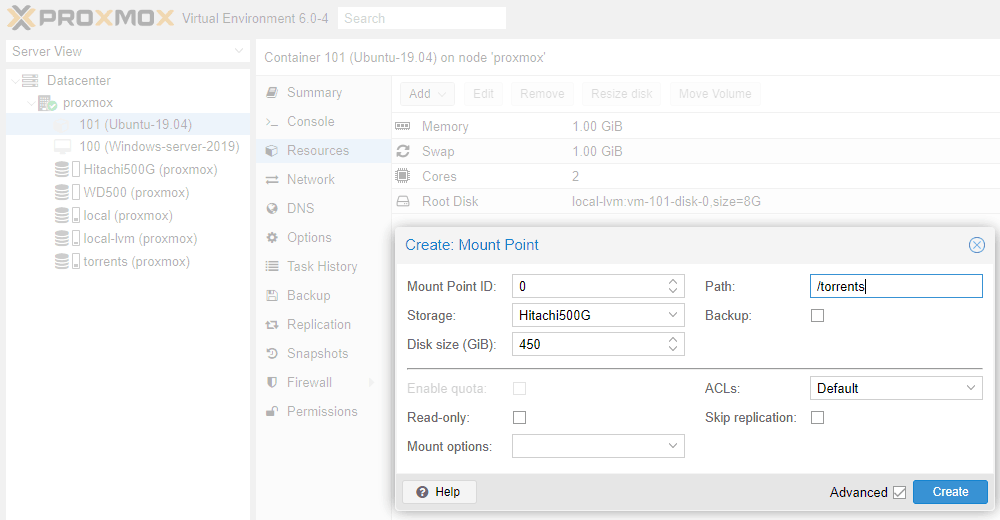
Mount point ID: 0
Storage: Select storage you created in step 4
Disk size: You can define a custom size for any mount point
Path: This is the directory you created in step 6
Click Create
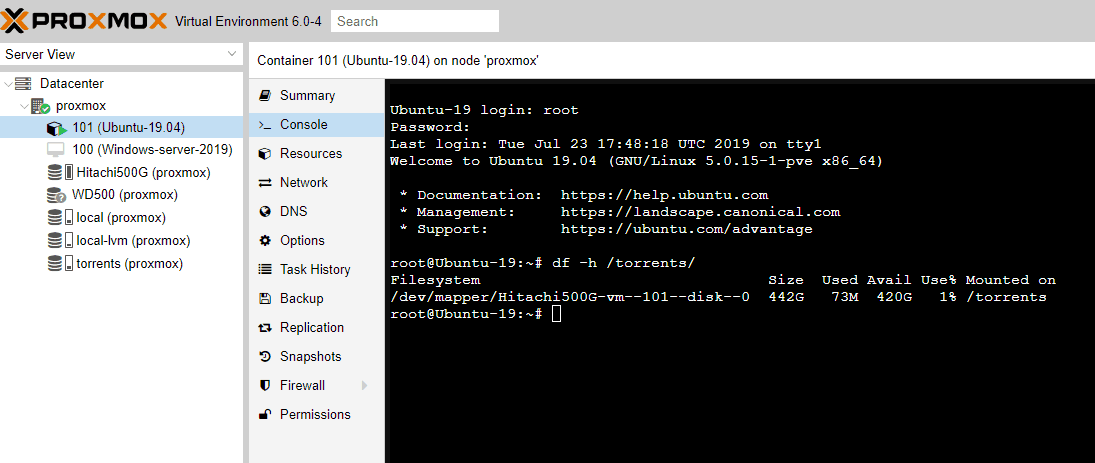
8. Start your container and check the new mount point.
References: https://www.hostfav.com/blog/index.php/2017/02/01/add-a-new-physical-hard-drive-to-proxmox-ve-4x-5x/
Hvala prjatu, pomagalo mi je!