In Cisco DNA center, version 2.3.3.6, under System -> Settings -> Trust & Privacy -> Device Certificate and PKI Certificates, you get an error message saying:

Internal Server Error: An unexpected condition was encountered. Please try after the system is restored.

Current solution is to restart pki broker and jboss service from DNAC shell.

magctl service restart -d apic-em-pki-broker-service
magctl service restart -d apic-em-jboss-ejbca

Wait a few minutes after restart and try again.

This is probably related to this bug: https://bst.cisco.com/bugsearch/bug/CSCwd25799

When you are greeted by this error: Error code: SSL_ERROR_INTERNAL_ERROR_ALERT trying to access Cisco WLC via Web GUI, you need remove trustpoint TP-self-signed-X cert, and reenable http server. This will regenerate self signed cert.

C9K5#show run | inc trustpoint TP-self
crypto pki trustpoint TP-self-signed-2997515006

C9K5#conf t
Enter configuration commands, one per line.  End with CNTL/Z.

C9K5(config)#no crypto pki trustpoint TP-self-signed-2997515006
% Removing an enrolled trustpoint will destroy all certificates
 received from the related Certificate Authority.

Are you sure you want to do this? [yes/no]: yes
% Be sure to ask the CA administrator to revoke your certificates.

C9K5(config)#no ip http server
C9K5(config)#no ip http secure-server
C9K5(config)#ip http server
C9K5(config)#ip http secure-server
C9K5(config)#ip http authentication local  

UPDATE: In the latest DNAC update, they changed things. In order to get root access now, Cisco support has to provide you a token. What a shame.

Content bellow this point is no longer relevant to the new DNAC versions.

In the newest version of Cisco DNA center, I think >= 2.3.3.6, root access is no more available by default. By default, you drop into so called magshell that’s running on BusyBox. This is not sufficient for serious debugging purposes. To enable root (bash shell) on DNA center, follow this steps.

1: Connect to your DNA center via SSH, on port 2222 and enter the following CLI command to determine your shell type:

magctl ssh shell display

Active shell for current user: magshell

2: Enable bash shell:

_shell -c 'sudo magctl ssh shell bash'

Password:
Warning! Activity within this shell can jeopardize the functioning of the system!

[sudo] password for maglev:

Successfully enabled bash for user, will be effective from next login.

3. To re-enable restricted shell, enter the following CLI command and password:

sudo magctl ssh shell magshell

[sudo] password for maglev:

Successfully enabled magshell for user, will be effective from next login.
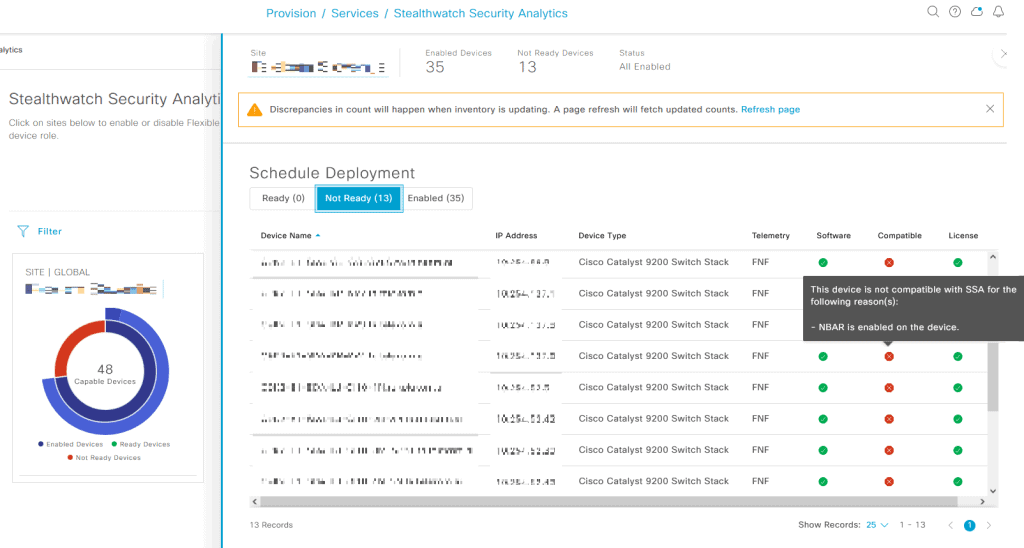
Had some issues with Cisco DNAC and Stealthwatch. After settings up Stealthwatch server and Netflow collector, some of SDA devices were not compatible with Stealthwatch. The reason was: “NBAR is enabled on this device“. In DNA center, NBAR and CBAR was actually disabled, but the problem stil persisted. CBAR and NBAR were previously enabled, but after disabling it, it did not clean all devices. Guess this is a “cleanup” bug in DNA center. Solution was to manually remove ip flow from affected devices.

DNA center version: 2.3.3.4

Screenshot of affected devices:

Solution: Clear ip flow from all interfaces on affected device, and resync device in DNA center.

Example:

conf t
int range gi1/0/1-48,Te1/1/1-4,Gi1/1/1-4
no ip flow monitor dnacmonitor input
no ip flow monitor dnacmonitor output
end
wr

Go to DNA center, Inventory -> Select device -> Actions -> Inventory -> Resync device

Wait couple of minutes, and you should be able to enable Stealthwatch for this device.

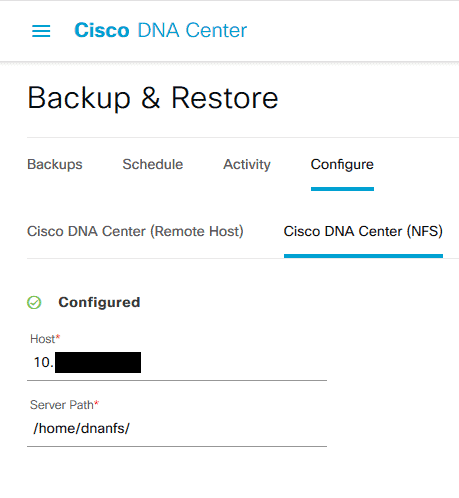
Whenever you update Cisco DNA center, backups stop working. You need to re-apply NFS configuration in DNA center GUI which will restart the docker container and enable backups again.

For example, delete one slash in the Server Path option, write it back and apply. Wait a few minutes for the Docker process to restart. Backups should work now.

EDIT: they fixed their official documentation

Official Cisco documentation about setting up NFS server for DNA center is here. The problem is, this is for Ubuntu, and Ubuntu has different names for group “nobody” than CentOS.

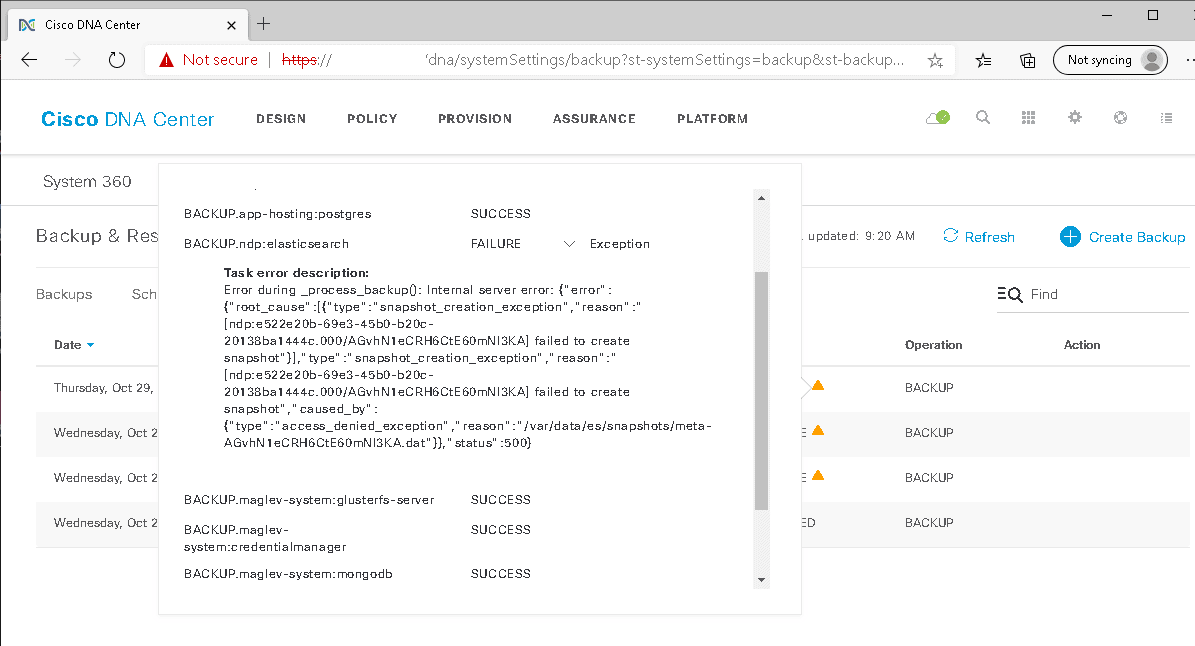
So if you get an error saying:

BACKUP.ndp:elasticsearch
FAILURE
Exception
Task error description:
Error during _process_backup(): Internal server error: {"error":{"root_cause":[{"type":"snapshot_creation_exception",
"reason":"[ndp:e522e20b-69e3-45b0-b20c-20138ba1444c.000/AGvhN1eCRH6CtE60mNl3KA] failed to create snapshot"}],"type":"
snapshot_creation_exception","reason":"[ndp:e522e20b-69e3-45b0-b20c-20138ba1444c.000/AGvhN1eCRH6CtE60mNl3KA] failed to
create snapshot","caused_by":{"type":"access_denied_exception","reason":"/var/data/es/snapshots/meta-AGvhN1eCRH6CtE60mNl3KA.dat"}},"status":500}

That means you have the wrong user and group set up on server NFS directory.

For Ubuntu:

chown nobody:nogroup /dir/to/nfs/share

For CentOS:

chown nfsnobody:nfsnobody /dir/to/nfs/share